Interior improvements

Kitchens and bathrooms

Build a practical plan for the rooms you use every day.

What we plan your project around

  1. A workable room layout

    Plan fixtures, openings and movement through the space.

  2. Coordinated finishes

    Choose surfaces and products with the installation sequence in mind.

  3. Clear trade handoffs

    Assign plumbing, electrical and waterproofing responsibilities.

From the first conversation

How the work takes shape.

Plan the work

  • Make a room-by-room list

    • Name each item to keep, repair, remove, or install.
    • Mark dimensions and photograph doorways, windows, water points, outlets, and transitions into adjoining rooms.
  • Choose the visible finishes

    • Record product names, sizes, colors, quantities, and who buys each item.
    • A finish selection can change trim, substrate preparation, or installation sequence.
  • Map the handoffs

    • Identify who handles plumbing, electrical, ventilation, waterproofing, permits, and inspections before walls or floors are closed.
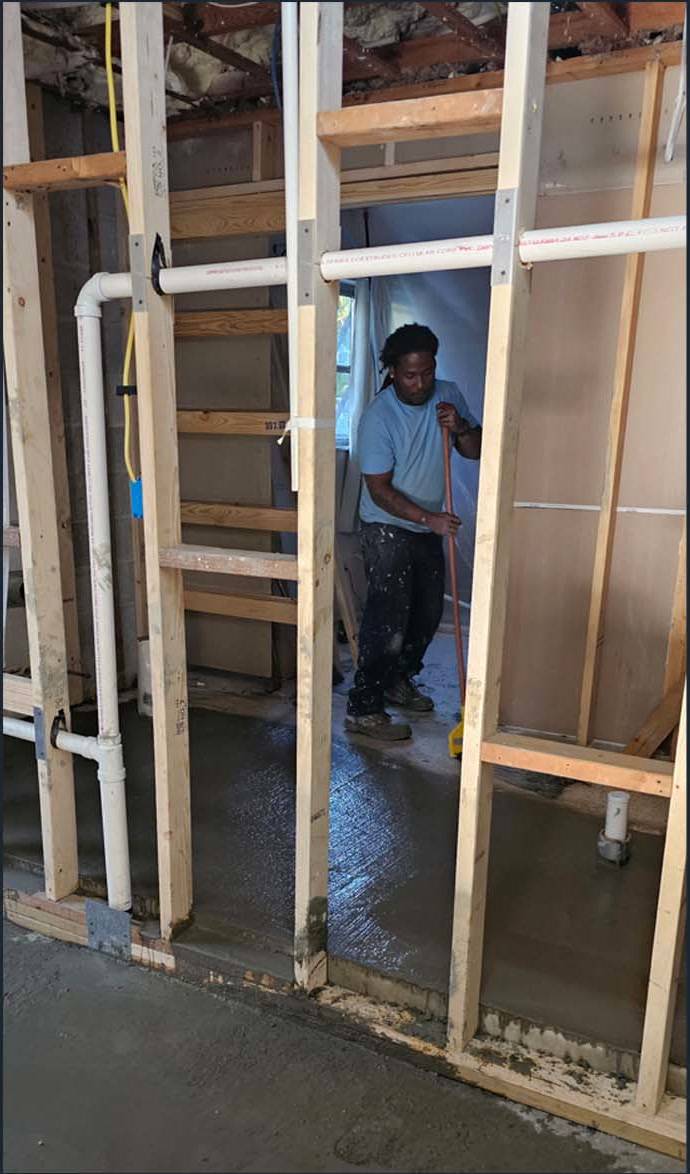
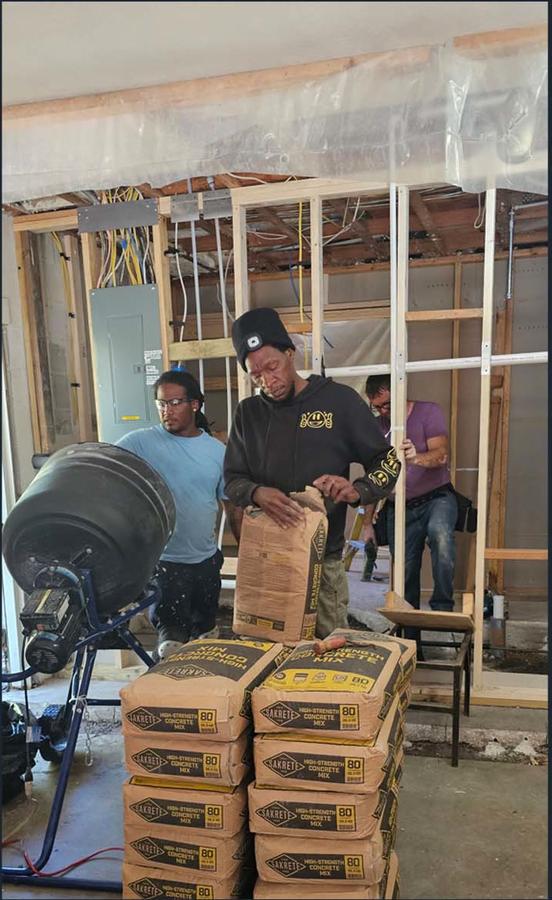
Bring the details together

Start your estimate conversation with these project details.

  • A room list with rough measurements and photos

  • What stays, moves, is removed, or gets replaced

  • Selections already made and items still undecided

See the full estimate checklist
Define
Rooms and surfaces
Select
Fixtures and finish materials
Sequence
Removal, rough-in, close-in
Confirm
Trade and permit responsibility

How to scope it

Plan the room around its finished surfaces.

Write down what stays, what comes out, and what the finished room should include. Cabinetry, counters, tile, flooring, paint, ventilation, and plumbing fixtures are separate decisions; hidden water damage or out-of-level surfaces can change the plan once exposed.

If opening a wall or floor reveals moisture, damaged framing, or an old unplanned connection, pause and agree on the added scope before it is covered again.

Planning your kitchens and bathrooms project

Kitchen and bathroom projects benefit from a room-by-room inventory. Identify cabinets, fixtures, surfaces and appliances that remain, then list the items to replace or move. This separates a finish update from a project that changes the layout or hidden systems.

Selections and supply

Record product choices and who will purchase them. Dimensions, availability and delivery dates should be discussed before they become dependencies for other work.

Living through the project

Explain which rooms must stay usable and where materials can be stored. Ask how removal, trade work, surface preparation and finishing will be sequenced, including any temporary loss of room access.

What affects the estimate?

The estimate should describe the work area, existing conditions and agreed finish. Two proposals can cover different preparation or completion tasks even when their headline descriptions sound similar. Ask which items are included, which are optional and which depend on a closer look at the property.

  • Make a room-by-room list: Name each item to keep, repair, remove, or install. Mark dimensions and photograph doorways, windows, water points, outlets, and transitions into adjoining rooms.
  • Choose the visible finishes: Record product names, sizes, colors, quantities, and who buys each item. A finish selection can change trim, substrate preparation, or installation sequence.
  • Map the handoffs: Identify who handles plumbing, electrical, ventilation, waterproofing, permits, and inspections before walls or floors are closed.
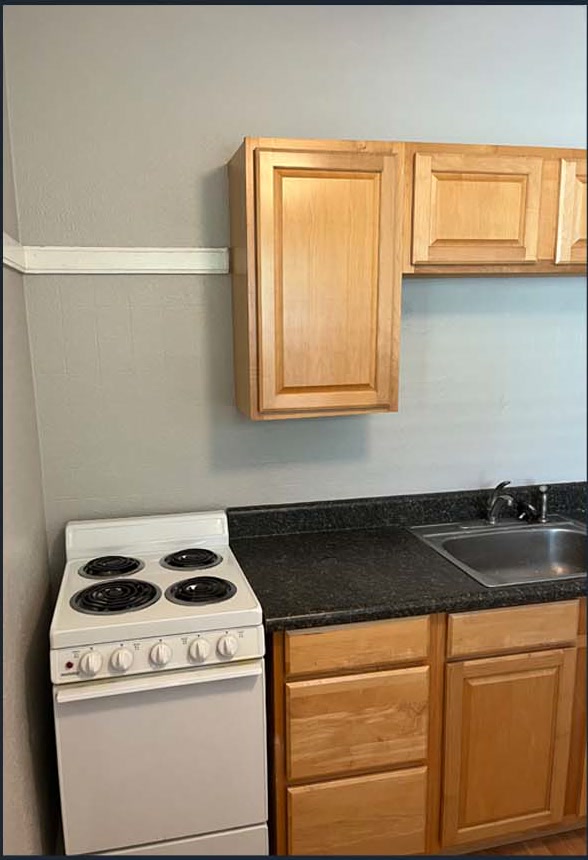
Information to send with your request

Send an overview of the space alongside close-up photographs. Include measurements where available, and label approximate dimensions as estimates. The following details help focus the conversation:

  • A room list with rough measurements and photos.
  • What stays, moves, is removed, or gets replaced.
  • Selections already made and items still undecided.
  • Access, occupancy, shutdown, and dust/noise limits.

Agree on the sequence before work starts

  1. Confirm the scope. Identify the exact areas involved, retained items, selected products and the intended finished condition. Record any unresolved questions before arranging the work.
  2. Coordinate access. Discuss delivery, parking, storage, occupied areas and any other work taking place at the property. Explain timing constraints early so they can be considered in the plan.
  3. Record changes. If the condition or requested work changes, ask how that affects the scope, price and timing before additional work proceeds.
  4. Define completion. Agree on cleanup, remaining materials, product information and the handoff to you or the next trade. Keep those details with the estimate for reference.

To discuss kitchens and bathrooms with A&J Landscaping & Development Inc., use the estimate checklist and send a project inquiry. Include the property location and the work you want done so the next conversation can address your actual project.

Fixture selection includes performance and maintenance

EPA WaterSense notes that labeled toilets meet its criteria for both efficiency and performance. Product labels can help frame a fixture discussion, but the selected model still needs to fit the room and the intended installation. Include care and replacement-part information when comparing choices. EPA WaterSense: maintaining water-using fixtures.

Make a fixture schedule with the model, finish, supplier and purchasing responsibility for each item. Record whether the product is already on site or still to be ordered. This gives the relevant trades a more useful reference than separate screenshots of products from different shops.

A finish update and a layout change are different projects

Replacing surfaces in their existing locations can involve a different scope from moving fixtures, appliances or walls. Mark proposed changes on a plan and list what remains. Ask which hidden systems or adjacent finishes may be affected by each change.

For kitchens, include appliances, cabinet openings and the intended work surfaces. For bathrooms, identify the shower or bath arrangement, storage and access needs. Resolve these decisions before comparing a proposal for cosmetic work with one that includes a wider reconfiguration.

Waterproofing and visible finishes need a coordinated scope

Ask who is responsible for the complete wet-area assembly and its interfaces with drains, fixtures and adjoining surfaces. Record the proposed products and who confirms their compatibility. Tile, sealant and decorative finishes should not be the only items described in a wet-area proposal.

Keep inspection or approval milestones visible in the sequence where they apply. Identify which work must remain accessible until it is checked. If several trades share the room, name the person responsible for coordinating the handoff between their tasks.

Use a selection list to control changes

A single selection list should cover flooring, wall finishes, counters, hardware, fixtures and lighting. Include quantities or dimensions where known. Mark undecided items clearly so they do not appear to be included as fixed choices in an estimate.

When a product becomes unavailable, discuss the effect of a substitute before approving it. Dimensions and installation requirements may matter as much as color. Keep the revised selection with the project records so everyone is working from the same information.

Plan the room's return to use

Discuss temporary arrangements if the kitchen or bathroom will be unavailable. Identify the work that must be complete before occupants can use it again and any remaining cosmetic tasks that will follow. Ask for product-specific care instructions for the installed surfaces and fixtures.

At the walkthrough, review doors, drawers, visible finish boundaries and the agreed trade handoffs. Create one list of remaining items with a responsible person for each. Keep receipts, model information and warranty documents together for later maintenance.

Make the estimate useful

Make the room list before estimating.

Email about kitchens and bathrooms
  1. 01A room list with rough measurements and photos
  2. 02What stays, moves, is removed, or gets replaced
  3. 03Selections already made and items still undecided
  4. 04Access, occupancy, shutdown, and dust/noise limits

Project imagery

Room and finish details
in view.

Look closely at the material, access, and finish involved in this kind of work.

Technical reading

Home-improvement planning

The difference is in the details

A rough idea. A defined kitchens and bathrooms plan.

An incomplete brief

What still needs an answer

  • The work area, existing condition and access are unclear.
  • Materials and preparation are left out of the scope.
  • Completion details and responsibilities have not been agreed.

A defined project

What to put in the plan

  • A workable room layout. Plan fixtures, openings and movement through the space.
  • Coordinated finishes. Choose surfaces and products with the installation sequence in mind.
  • Clear trade handoffs. Assign plumbing, electrical and waterproofing responsibilities.
  1. Training

    Read the course records

    • Rachee Johnson’s NCDOT course completions cover business insights and bidding, drones and construction surveying, and pipe installation and erosion control.
    View completion certificates →
  2. Scope

    Start with the actual conditions

    • A room list with rough measurements and photos.
    • What stays, moves, is removed, or gets replaced.
    See the estimate checklist →

Define your project

Kitchens and bathrooms: scopes to discuss

  1. Kitchen updates
  2. Bathroom updates
  3. Fixture changes
  4. Finish replacement

Before work begins

Three details to agree for kitchens and bathrooms

  1. Make a room-by-room list

    • Name each item to keep, repair, remove, or install. Mark dimensions and photograph doorways, windows, water points, outlets, and transitions into adjoining rooms.
  2. Choose the visible finishes

    • Record product names, sizes, colors, quantities, and who buys each item. A finish selection can change trim, substrate preparation, or installation sequence.
  3. Map the handoffs

    • Identify who handles plumbing, electrical, ventilation, waterproofing, permits, and inspections before walls or floors are closed.

Ready to discuss kitchens and bathrooms?

Contact A&J Landscaping & Development Inc. with your project details.

  • Share the property location, photos and measurements so the conversation starts with the actual space.
  • Describe your priorities, preferred materials and access restrictions, including any areas that need to remain in use.
  • Ask which preparation, supplies, cleanup and trade responsibilities belong in the estimate before agreeing to the work.
Request an estimate Browse all services →

Trade-specific questions

Frequently asked questions

Can I request just one part of the remodel?

Yes. List the exact room and finish tasks. State who is supplying materials and whether another trade has already completed the plumbing or electrical work.

How should I compare two remodel estimates?

Compare the same room list, product allowances, demolition and disposal, protection, trade handoffs, change-order rules, and what is expressly excluded.

What decisions should I make before an estimate?

Share the desired layout, fixtures, finishes, appliances, budget range and which existing elements should stay.

What can change after walls are opened?

Hidden water damage, wiring, plumbing or framing conditions can affect the scope. Ask how findings and price changes will be documented.

How do I plan around an occupied home?

Discuss dust protection, access, temporary use of the room, material storage and daily cleanup before setting the work sequence.